user guide - 1800cpap - index
TRANSCRIPT
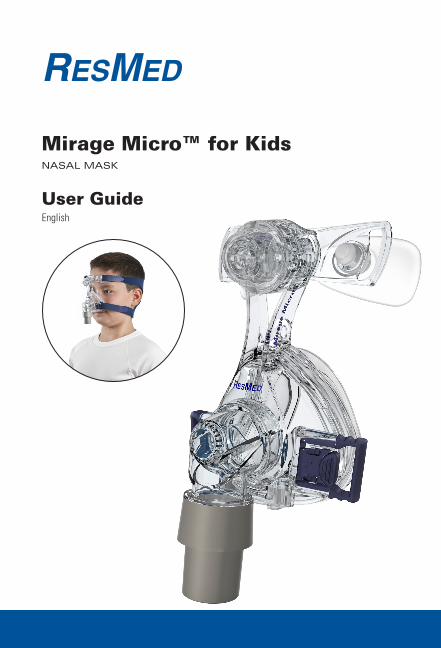
Mirage Micro™ for Kidsnasal mask
User GuideEnglish

i
Fitting / Mise en place / Ajuste / Colocação e ajuste
1 2 3
4 5 6
7 8
Mirage Micro™ for Kids

ii
Mirage Micro for Kids
B C D
A
1
2
34
5
6
78
9
10
11

iii
Mask components / Composants du masque / Piezas de la mascarilla / Componentes da máscaraItem / Article / Artículo / Item
Description / Description / Descripción / Descrição
Part number / Code produit / Número de pieza / Código do produto
1 Mask frame / Entourage rigide / Armazón de la mascarilla / Armação da máscara
16395 (S)
2 Dial / Molette de réglage / Disco / Botão giratório
61289
3 Forehead support / Support frontal / Apoyo para la frente / Suporte para a testa
16393
4 Forehead support pad / Tampon frontal / Almohadilla del apoyo para la frente / Almofada do suporte para a testa
60123 (1)60124 (10)
5 Cushion / Bulle / Almohadilla / Almofada 16388 (S)
6 Headgear clip / Clip d’attache du harnais / Broche del arnés / Presilha do arnês
16569 (2)16734 (10)
7 Headgear / Harnais / Arnés / Arnês 16118 (S)16117 (M)16119 (L)
8 Ports cap / Bouchon d’entrées / Tapón de los puertos / Tampa das portas
16570 (2)16571 (10)
9 Swivel / Pièce pivotante / Pieza giratoria / Peça giratória
16565
10 Elbow / Coude / Codo / Cotovelo 16387
11 Vent / Orifice de ventilation / Ventilación / Respiradouro
-
A Complete system / Système complet / Sistema completo / Sistema completo
61013 (S)
B Frame system / Entourage complet / Sistema del armazón / Sistema da armação
16378 (S)
C Frame assembly / Ensemble entourage / Montaje del armazón / Conjunto da armação
16383 (S)
D Elbow assembly / Ensemble coude / Conjunto del codo / Conjunto do cotovelo
16399
S Small / Petit / Pequeña / Pequeno(a),M Medium / Moyen / Mediana / Médio(a),L Large / Grand / Grande / Grande

iv
Disassembly / Démontage / Desmontaje / Desmontagem
4
1 2 3
5
6 7 8
(b)
(a)
Removal / Enlèvement / Cómo quitarse la mascarilla / Remoção
1

v
4
1 2 3
5
6 7
(b)
(a)(c)
Reassembly / Remontage / Montaje / Remontagem

1
English
Mirage Micro™ for Kidsnasal mask
Thank you for choosing the Mirage Micro for Kids.
Intended useThe Mirage Micro for Kids channels airflow noninvasively to a patient from a positive airway pressure device such as a continuous positive airway pressure (CPAP) or bilevel system. The Mirage Micro for Kids is:
to be used by children aged 7 and older, and more than 40 lbs (18.2 kg), for •whom positive airway pressure has been prescribedintended for single-patient re-use in the home and multipatient re-use in •the hospital/institutional environment.
WARNINGThe mask must be used under qualified supervision for patients •who are unable to remove the mask by themselves. The mask may not be suitable for those predisposed to aspiration.The mask should be used with CPAP or bilevel devices that •allow pressure relief during expiration as recommeded by your physician or respiratory therapist.If the mask is prescribed for children with serious congenital •conditions or cognitive impairments then using a CPAP or bilevel device with appropriate alarms is recommended.The vent holes must be kept clear. •The mask should not be used unless the device is turned on. Once •the mask is fitted, ensure the device is blowing air.This mask is designed to provide a stable, effective air seal with •minimum headgear tension. High headgear tension may lead to facial deformities with long-term use. Regular clinician review of growth patterns and the use of different styles of mask is recommended.Ensure that the nasal cushion does not block the nostrils at any •time during fitting or use.

2
Follow all precautions when using supplemental oxygen. •Oxygen flow must be turned off when the CPAP or bilevel device •is not operating, so that unused oxygen does not accumulate within the device enclosure and create a risk of fire.This mask contains small parts that could cause choking. Your •clinician should assess the suitability of the mask.Remove all packaging before using the mask. •
Using your maskWhen using your mask with ResMed CPAP or bilevel devices that have mask setting options, refer to the Technical Specifications section in this user guide for mask selection options.For a full list of compatible devices for this mask, see the Mask/Device Compatibility List on www.resmed.com on the Products page under Service & Support. If you do not have internet access, please contact your ResMed representative.Notes:
SmartStop may not operate effectively when using this mask with some •CPAP or bilevel devices that have this feature.If you experience nasal dryness or irritation, using a humidifier is •recommended.
FittingThe Fitting illustrations section in this user guide shows the sequence for obtaining the best fit and comfort when using your mask.
1. Turn the dial, so that the forehead support is fully extended.
2. Hold the mask over your nose and pull the headgear over your head.
3. Bringing the lower straps below your ears, connect the headgear clip to the the mask frame.
4. Unfasten the Velcro®, pull the upper headgear straps evenly until they are comfortable and firm, and reattach the Velcro.
5. Repeat step 4 with the lower headgear straps.
6. Connect the main air tubing to the swivel. Then connect the free end of the air tubing to your device and turn on.
7. Lie down in your sleeping position. Adjust the dial until the mask is evenly positioned on your face. It should be comfortable, with a satisfactory seal. Adjust the headgear straps if necessary.
8. Shows how the fitted mask is positioned.

3
RemovalTo remove the mask, disconnect one of the lower headgear clips and pull the mask and headgear up over your head.
DisassemblyRefer also to the disassembly illustrations in this user guide.
1. Detach the air tubing.
2. Unclip the headgear clips and unthread the upper headgear straps. It is not necessary to remove the headgear clips from the headgear.
3. Remove the elbow assembly from the mask frame by pivoting from the bottom edge.
4. Remove the swivel from the elbow.
5. Note the position on the dial for the next time you use the mask. Unscrew and remove the dial (a) then pull the forehead support (b) out of the mask frame.
6. Remove the forehead support pads from the forehead support.
7. Remove the cushion from the mask frame.
8. Remove the ports cap from the mask frame.

4
ReassemblyRefer also to the reassembly illustrations in this user guide.
1. Insert the ports cap.
2. Insert the cushion into the mask frame. Ensure that the arrows at base of the cushion and mask frame are aligned.
3. Push the forehead pads firmly into the forehead support.
4. Insert the forehead support (a) into the mask frame and screw (b) the dial clockwise onto the pole. Turn the dial until it clicks (c). Ensure the dial sits flush against the frame.
5. Insert the swivel into the end of the elbow.
6. Insert the assembled elbow into the mask frame.
7. Reattach the top headgear straps by threading them through the loops.
Cleaning your mask in the homeYour mask and headgear should be gently handwashed only.Daily/After each use:
Disassemble the mask components according to the disassembly •instructions.Thoroughly clean the separated mask components (excluding headgear), •by gently rubbing in warm (approximately 86°F/30°C) water using mild soap. To optimize the mask seal, facial oils should be removed from the cushion •after use. Use a soft bristle brush to clean the vent. •Inspect each component and if required, repeat washing until visually •clean.Rinse all components well with drinking quality water and allow to air dry •out of direct sunlight.When all components are dry, reassemble according to the reassembly •instructions.
Weekly:Handwash the headgear. It may be washed without being disassembled. •

5
WARNINGDo not use aromatic-based solutions or scented oils (eg, •eucalyptus or essential oils), bleach, alcohol or products that smell strongly (eg, citrus) to clean any of the mask components. Residual vapours from these solutions can be inhaled if not rinsed thoroughly. They may also damage the mask, causing cracks.
CAUTIONIf any visible deterioration of a system component is apparent •(cracking, crazing, tears or cushion damage etc), the component should be discarded and replaced.Avoid connecting flexible PVC products (eg, PVC tubing) directly •to any part of the mask. Flexible PVC contains elements that can be detrimental to the materials of the mask, and may cause the components to crack or break.
Reprocessing the mask between patientsThis mask should be reprocessed when used between patients.Cleaning, disinfection and sterilization instructions are available from the ResMed website, www.resmed.com/masks/sterilization/americas.If you do not have internet access, please contact your ResMed representative.

6
TroubleshootingProblem/possible cause Solution
Mask is uncomfortable
Headgear straps are too tight. Adjust straps evenly. The forehead support ‘anchors’ your mask and should sit firmly on your forehead.
Fit is too tight. Wind out dial.
Mask is too noisy
Ports cap or elbow incorrectly inserted.
Remove the ports cap or elbow from the mask, then reassemble according to the instructions.
Vent is blocked or partially blocked. If the vent requires cleaning, use a soft bristle brush.
Mask is incorrectly assembled. Disassemble the mask, then reassemble according to the instructions.
Mask leaks around the face
Mask not positioned correctly. Gently pull the cushion away from the face to reinflate. Reposition your mask according to the instructions.
Air leaking around the bridge of the nose.
Wind the dial in.
Air leaking around the top of the lip. Wind the dial out and or tighten the bottom straps.
Mask cushion is misaligned or creased.
Ensure the arrows at the base of the cushion and mask frame are aligned. Ensure the cushion has no creases in it. Undo the headgear clip, check the cushion and reposition the mask over your nose.
The mask does not fit properly
Cushion and/or mask could be the wrong size.
Talk to your clinician.
Mask is incorrectly assembled. Disassemble the mask, then reassemble according to the instructions.
Cushion may be dirty. Clean cushion according to the instructions.
Cannot insert forehead support into mask frame
The dial has been inserted into the frame before the forehead support.
Push the end of the dial onto a hard surface until the dial comes out of the frame. Reassemble according to the instructions.

7
WARNINGAt a fixed rate of supplemental oxygen flow, the inhaled oxygen •concentration varies, depending on the pressure settings, patient breathing pattern, mask, point of application and leak rate. The technical specifications of the mask are provided for your •clinician to check that they are compatible with the CPAP or bilevel device. If used outside specification or if used with incompatible devices, the seal and comfort of the mask may not be effective, optimum therapy may not be achieved, and leak, or variation in the rate of leak, may affect the CPAP or bilevel device function.Discontinue using this mask if you have ANY adverse reaction to •the use of the mask, and consult your physician or sleep therapist.Using a mask may cause tooth, gum or jaw soreness or aggravate •an existing dental condition. If symptoms occur, consult your physician or dentist.As with all masks, some rebreathing may occur at low CPAP •pressures.Refer to your CPAP or bilevel device manual for details on settings •and operational information.

8
Technical specifications
Pressure–flow curve
The mask contains passive venting to protect against rebreathing. As a result of manufacturing variations, the vent flow rate may vary.
Dead space information
Physical dead space is the empty volume of the mask to the end of the swivel. Using the small cushion it is 86 mL.
Therapy pressure 4 to 20 cm H2O
Resistance Drop in pressure measured (nominal)at 50 L/min: 0.1 cm H2O at 100 L/min: 0.7 cm H2O
Environmentalconditions
Temperature Humidity
Operating:
Storage and Transport:
+41°F to +104°F(+5°C to +40°C)
-4°F to +140°F( -20°C to +60°C)
15% to 95% relative humidity non-condensing
up to 95% relative humidity non-condensing
Gross dimensionsSmall:
Mask fully assembled - no headgear5.51“ (H) x 3.58“ (W) x 3.66“ (D)(140 mm (H) x 91 mm (W) x 93 mm (D))
Mask setting options
Select ‘STANDARD’ as the mask option.
Notes: The mask system does not contain latex, PVC or DEHP materials. •The manufacturer reserves the right to change these specifications •without notice.
0
10
20
30
40
50
60
4 6 8 10 12 14 16 18 20
Pressure(cm H2O)
Flow(L/min)
4 19
8 28
12 34
16 40
20 45Mask pressure (cm H2O)
Vent
flow
rat
e (L
/min
)


