Download - Monedero Crochet Pattern
8/13/2019 Monedero Crochet Pattern
http://slidepdf.com/reader/full/monedero-crochet-pattern 1/11
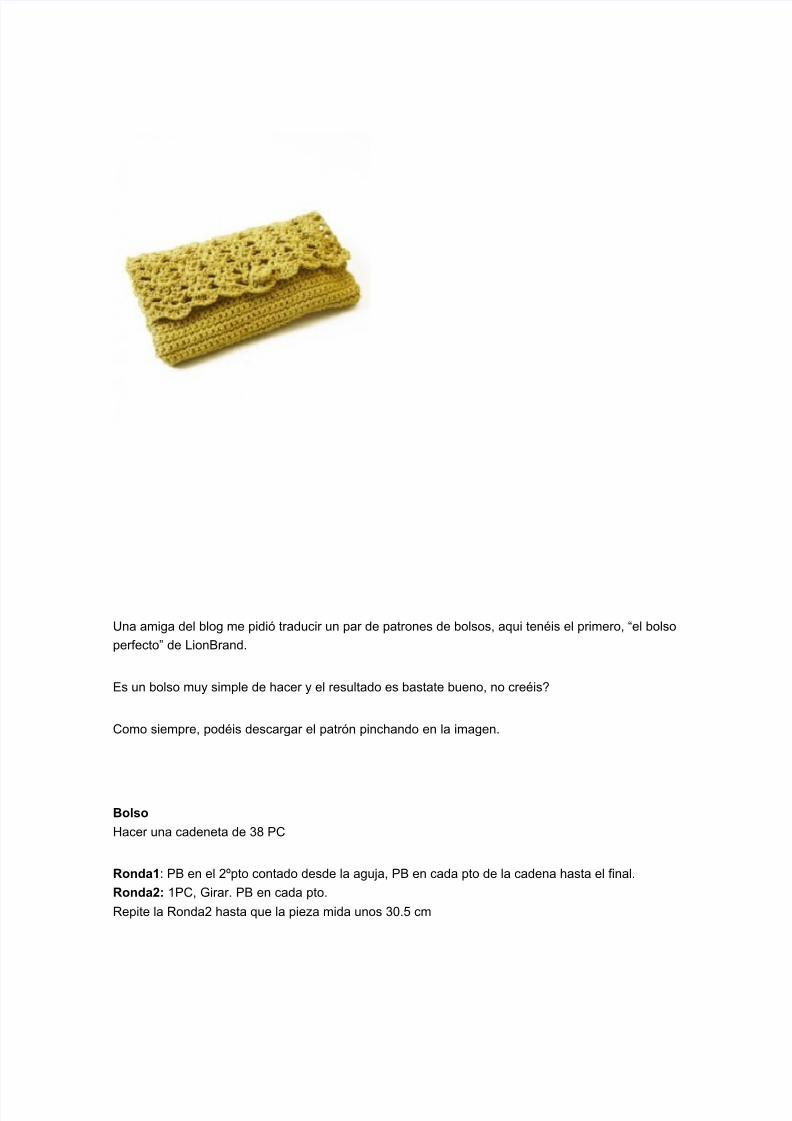
Una amiga del blog me pidió traducir un par de patrones de bolsos, aqui tenéis el primero, “el bolso
perfecto” de LionBrand.
Es un bolso muy simple de hacer y el resultado es bastate bueno, no creéis?
Como siempre, podéis descargar el patrón pinchando en la imagen.
Bolso
Hacer una cadeneta de 38 PC
Ronda1: PB en el 2ºpto contado desde la aguja, PB en cada pto de la cadena hasta el final.
Ronda2: 1PC, Girar. PB en cada pto.
Repite la Ronda2 hasta que la pieza mida unos 30.5 cm
8/13/2019 Monedero Crochet Pattern
http://slidepdf.com/reader/full/monedero-crochet-pattern 2/11
Siguiente Ronda: 3PC, girar. Salta el sig pto, teje 1PA en el sig pto, *Saltar 4 ptos, (PA, PC, PA,
PC, PA, PC, PA) en el sig pto (esto formará una “concha”). Repite desde * hasta el final. En la
última repetición, salta 4 ptos, 2PA en el último pto.
Siguiente Ronda: 3PC, girar. Saltar el sig pto, PA en el sig *teje una “concha” en el PC central de
la concha de la ronda anterior; repite desde * hasta el final terminando con 2PA en el último pto.
Repite las 2 últimas rondas hasta que la pieza mida unos 43 cm. Rematar.
Botón
2PC
Ronda1: 3PB en el primer pto, une con un PR al inicio para formar un anillo.
Ronda2: 1PC, 2PB en cada pto, une con un PR al inicio de la ronda.
Ronda3: 1PC *PB en el sig pto, 2PB en el sig; repite desde * alrededor. Une al inicio con un PR
Ronda4: 1PC *PB en el sig pto, DIS; repite desde * alrededor. Une al inicio con un PR. Rematar
Corta el hilo dejando una hebra larga.
Con la aguja de coser y con el hilo que has dejado, cose alrededor del borde y tira fuertemente
para formar el botón. Rematar. Usa el hilo restante para coserlo al bolso.
Finalizando
Dobla el borde de abajo del bolso hacia arriba unos 15cm y cose los lados. Cose el botón. Usa el
espacio entre las “conchas” como ojales para el botón.
Si quieres, de manera opcional puedes hacer una correa para colgar el bolso:
Haz una cadeneta de unos 145 cm de largo.
Ronda 1 y 2: Repetir las rondas 1 y 2 del bolso.
Ronda3: Repetir la ronda 2
Rematar
Coser las puntas en el interior del bolso.

8/13/2019 Monedero Crochet Pattern
http://slidepdf.com/reader/full/monedero-crochet-pattern 3/11
Bag Pattern
Sunday, June 7, 2009 4:37 PM
Translation for the Fat Bag by Samanta Maragno
_____________________
If you make this bag from #4 yarn and an H hook, the bag comes
out about 8 inches high & 12 inches across at the widest point.
That's a bit small for me, so the tan bag shown in the pattern Imade by adding 6 rows to each end, and 6 rows across the middle.
It's about 10 inches high and about 15 inches across at the widest
point.
I also made another bag by using 2 strands of #4 yarn held
together, and a K hook & by following the pattern, not adding any
8/13/2019 Monedero Crochet Pattern
http://slidepdf.com/reader/full/monedero-crochet-pattern 4/11
rows, it came out about the same larger size, 10 x 15 inches.
_____________________
Materials:
H hook & #4 yarn
orK hook - if you use 2 strands of #4
(thicker yarn & bigger hook will make the bag come out bigger.)
For the smaller purse, I used less than 1 skein of solid color Red
Heart Super Saver.
However, the speckled yarn comes in smaller skeins, so you may
need just a little more than 1.
For the larger purses I used about 1 1/2 skeins.
For the pattern chart:
click here
(If you right click on the image & save it to your computer & then
print it out, it should print out bigger.)
_____________________
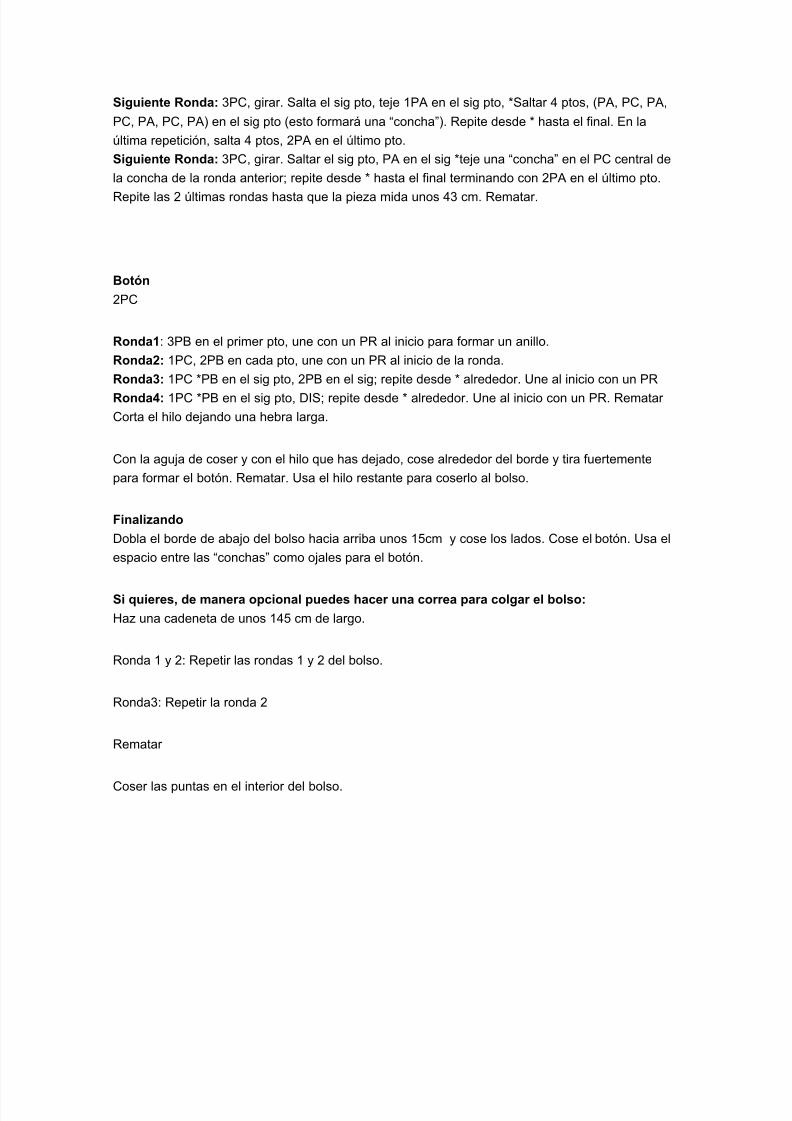
Purse Body:
Start with chain 18 and follow according to the chart. It will lookkind of curved, like this-
(click on photos to embiggen)
8/13/2019 Monedero Crochet Pattern
http://slidepdf.com/reader/full/monedero-crochet-pattern 5/11
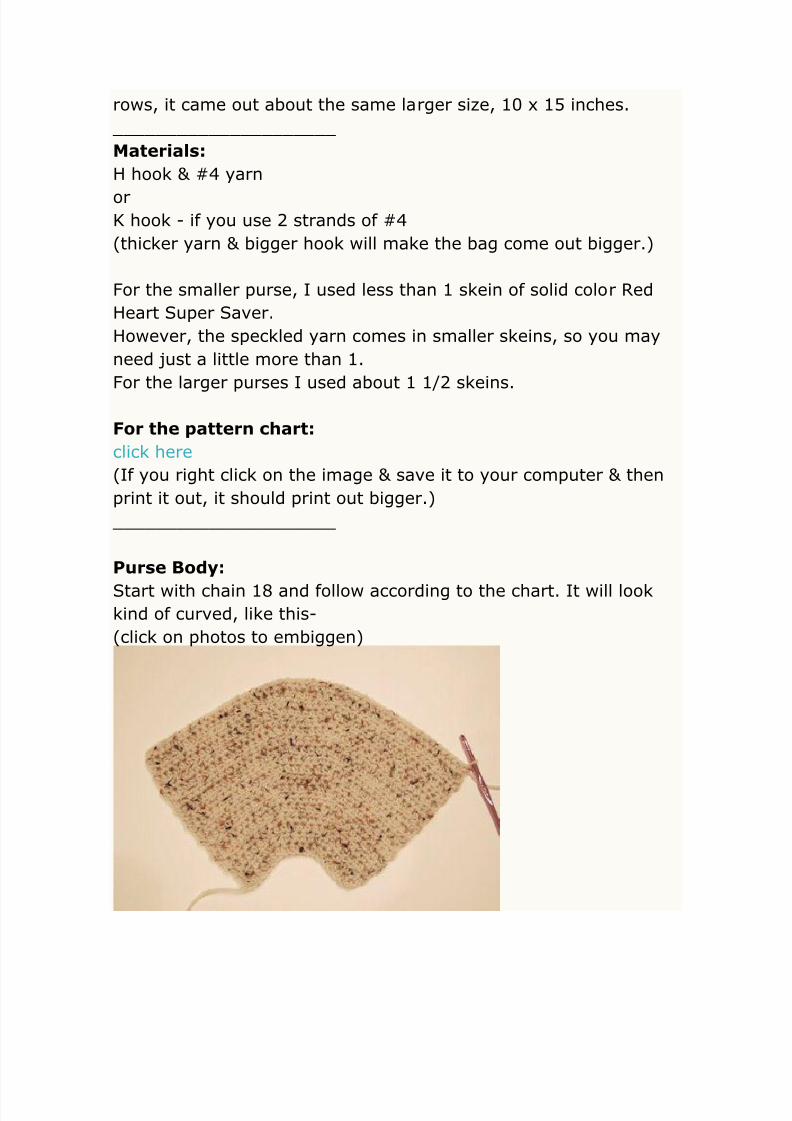
Finished body. It will have a sort of bowl shape-
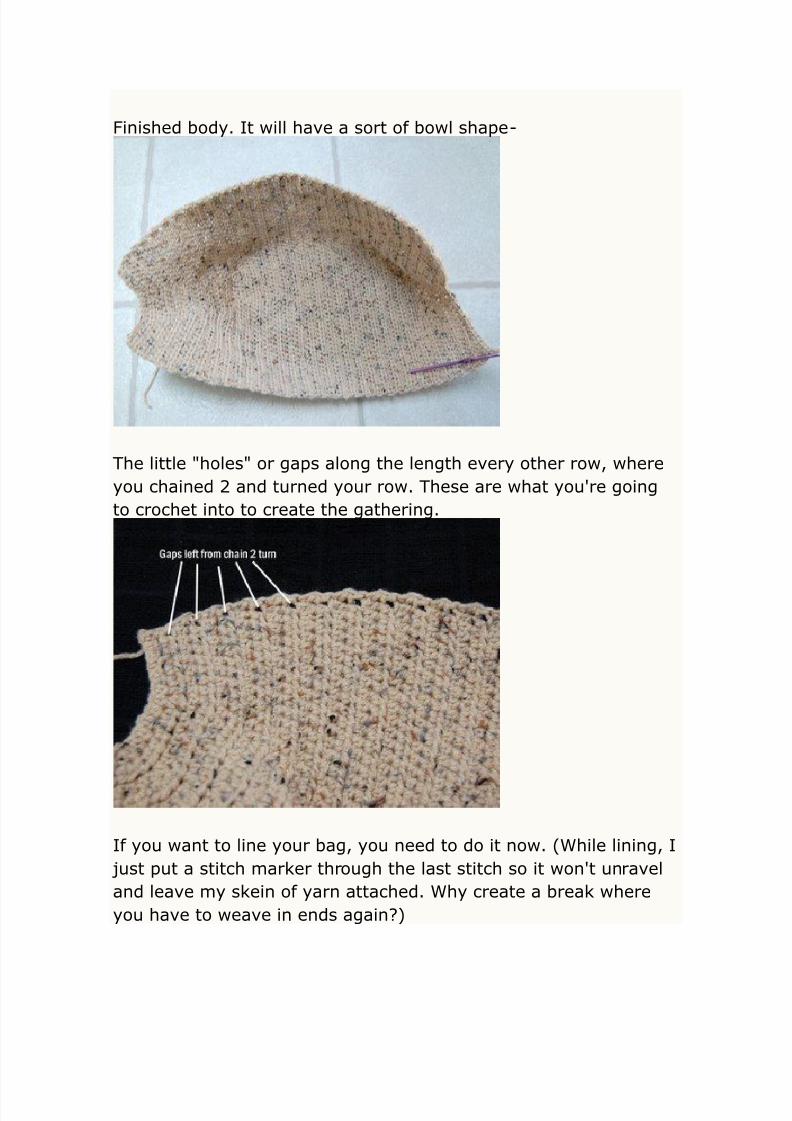
The little "holes" or gaps along the length every other row, where
you chained 2 and turned your row. These are what you're going
to crochet into to create the gathering.
If you want to line your bag, you need to do it now. (While lining, I
just put a stitch marker through the last stitch so it won't unravel
and leave my skein of yarn attached. Why create a break where
you have to weave in ends again?)
8/13/2019 Monedero Crochet Pattern
http://slidepdf.com/reader/full/monedero-crochet-pattern 6/11
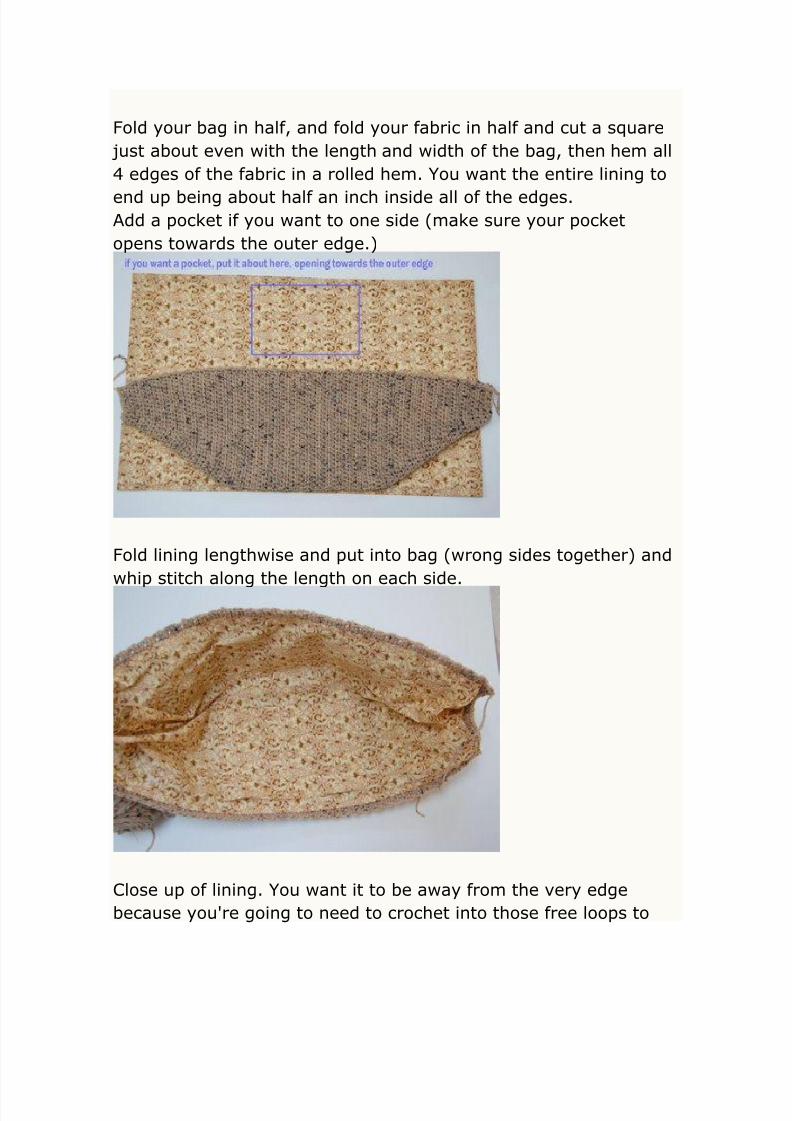
Fold your bag in half, and fold your fabric in half and cut a square
just about even with the length and width of the bag, then hem all
4 edges of the fabric in a rolled hem. You want the entire lining to
end up being about half an inch inside all of the edges.Add a pocket if you want to one side (make sure your pocket
opens towards the outer edge.)
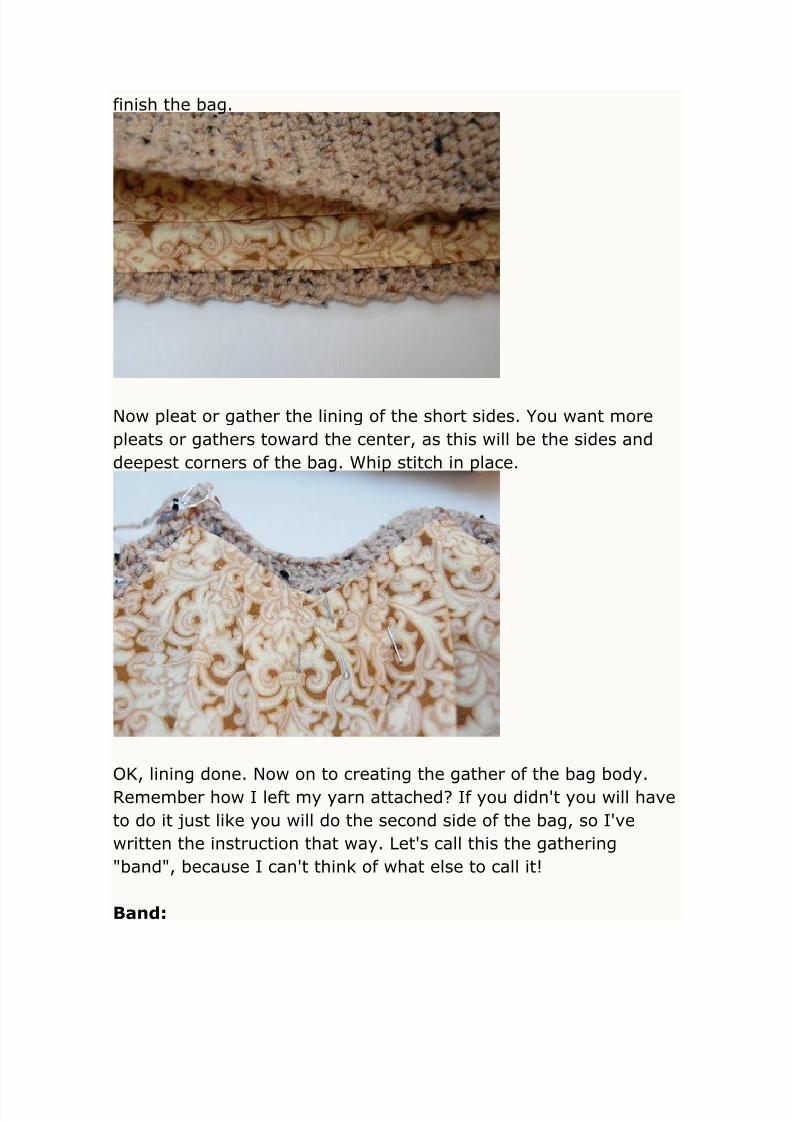
Fold lining lengthwise and put into bag (wrong sides together) and
whip stitch along the length on each side.
Close up of lining. You want it to be away from the very edge
because you're going to need to crochet into those free loops to
8/13/2019 Monedero Crochet Pattern
http://slidepdf.com/reader/full/monedero-crochet-pattern 7/11
finish the bag.
Now pleat or gather the lining of the short sides. You want more
pleats or gathers toward the center, as this will be the sides and
deepest corners of the bag. Whip stitch in place.
OK, lining done. Now on to creating the gather of the bag body.
Remember how I left my yarn attached? If you didn't you will have
to do it just like you will do the second side of the bag, so I've
written the instruction that way. Let's call this the gathering
"band", because I can't think of what else to call it!
Band:
8/13/2019 Monedero Crochet Pattern
http://slidepdf.com/reader/full/monedero-crochet-pattern 8/11
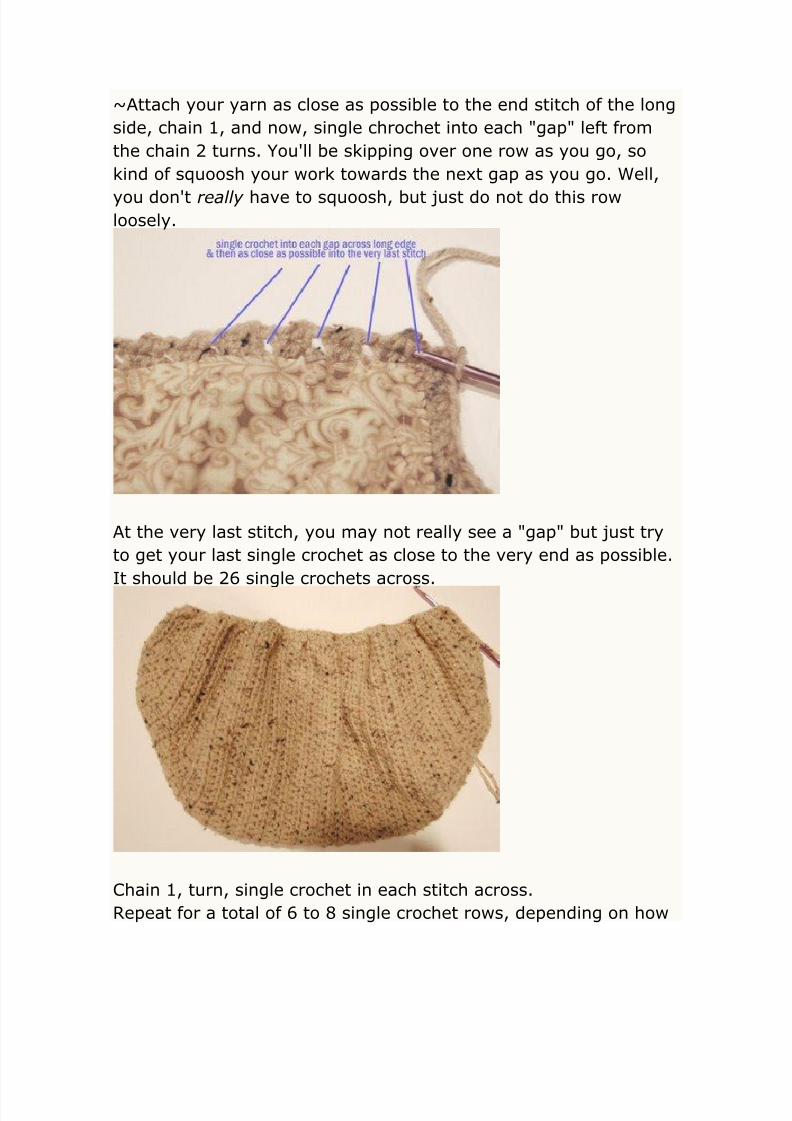
~Attach your yarn as close as possible to the end stitch of the long
side, chain 1, and now, single chrochet into each "gap" left from
the chain 2 turns. You'll be skipping over one row as you go, so
kind of squoosh your work towards the next gap as you go. Well,
you don't really have to squoosh, but just do not do this rowloosely.
At the very last stitch, you may not really see a "gap" but just try
to get your last single crochet as close to the very end as possible.
It should be 26 single crochets across.
Chain 1, turn, single crochet in each stitch across.
Repeat for a total of 6 to 8 single crochet rows, depending on how
8/13/2019 Monedero Crochet Pattern
http://slidepdf.com/reader/full/monedero-crochet-pattern 9/11
wide you want it to look, it's up to you. With thicker yarn I do less
rows.
Tie off.
Do the other side of the purse the same way.
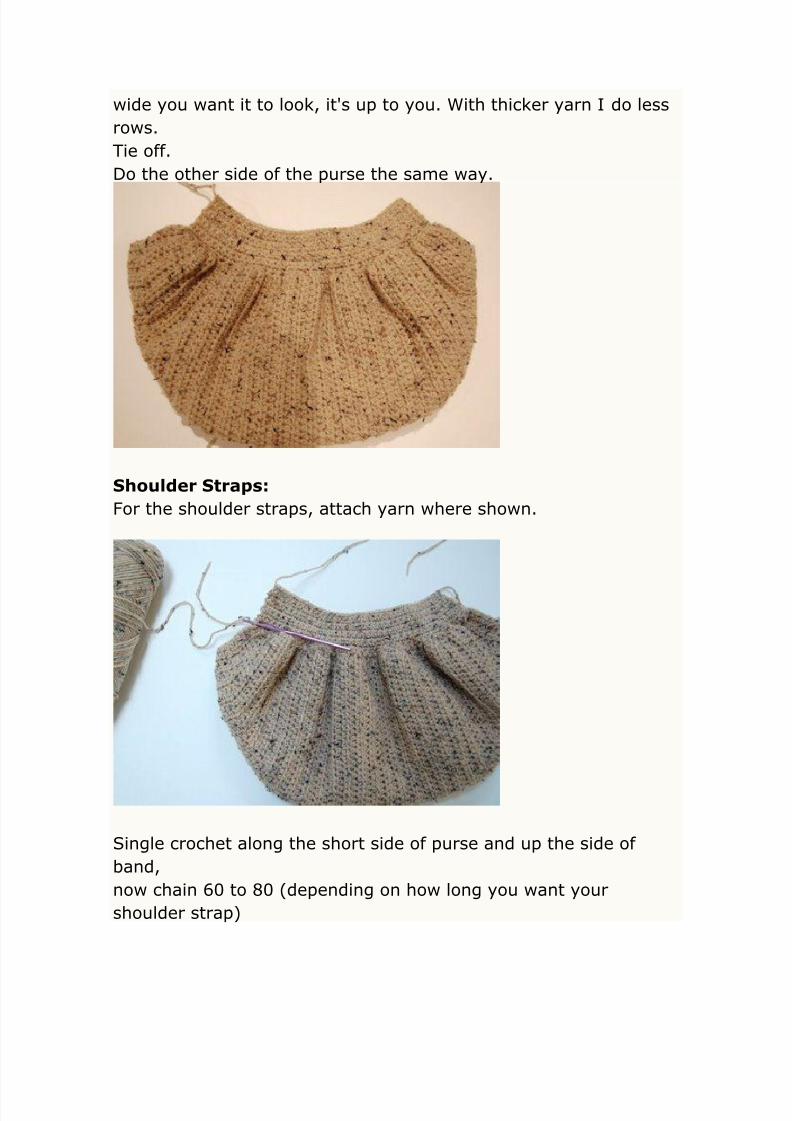
Shoulder Straps:
For the shoulder straps, attach yarn where shown.
Single crochet along the short side of purse and up the side of
band,
now chain 60 to 80 (depending on how long you want your
shoulder strap)
8/13/2019 Monedero Crochet Pattern
http://slidepdf.com/reader/full/monedero-crochet-pattern 10/11
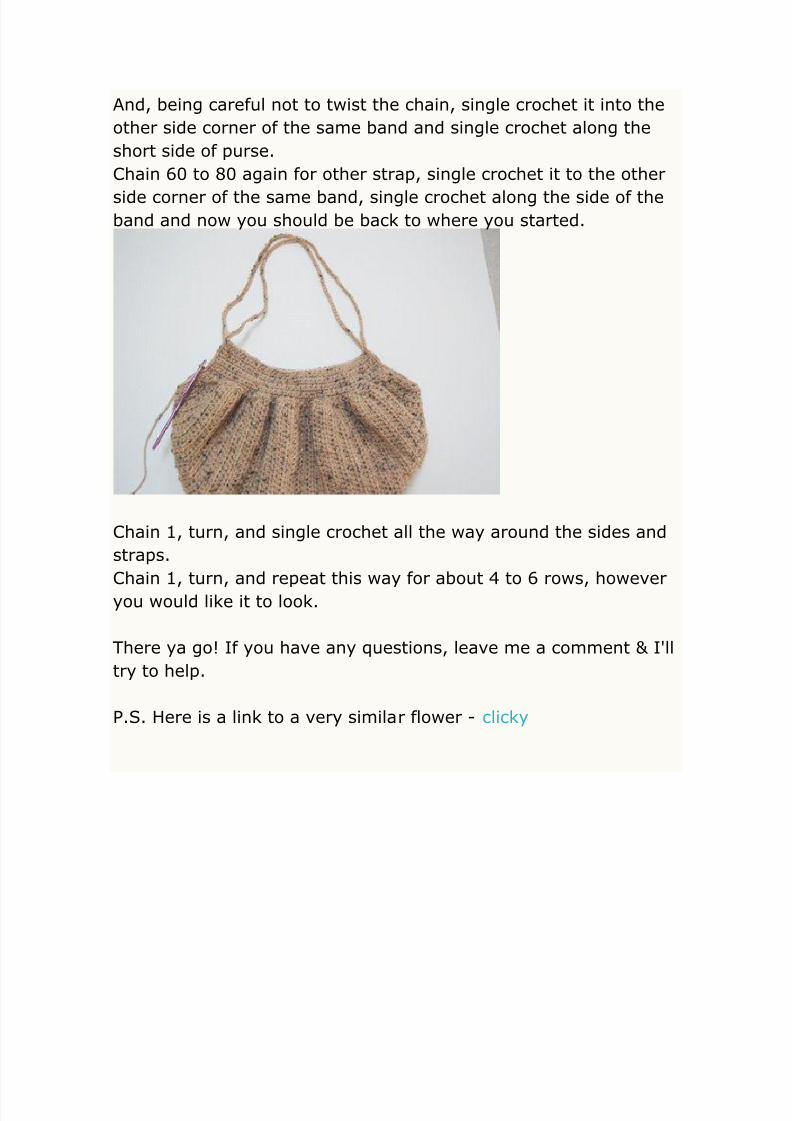
And, being careful not to twist the chain, single crochet it into the
other side corner of the same band and single crochet along the
short side of purse.
Chain 60 to 80 again for other strap, single crochet it to the other
side corner of the same band, single crochet along the side of theband and now you should be back to where you started.
Chain 1, turn, and single crochet all the way around the sides and
straps.
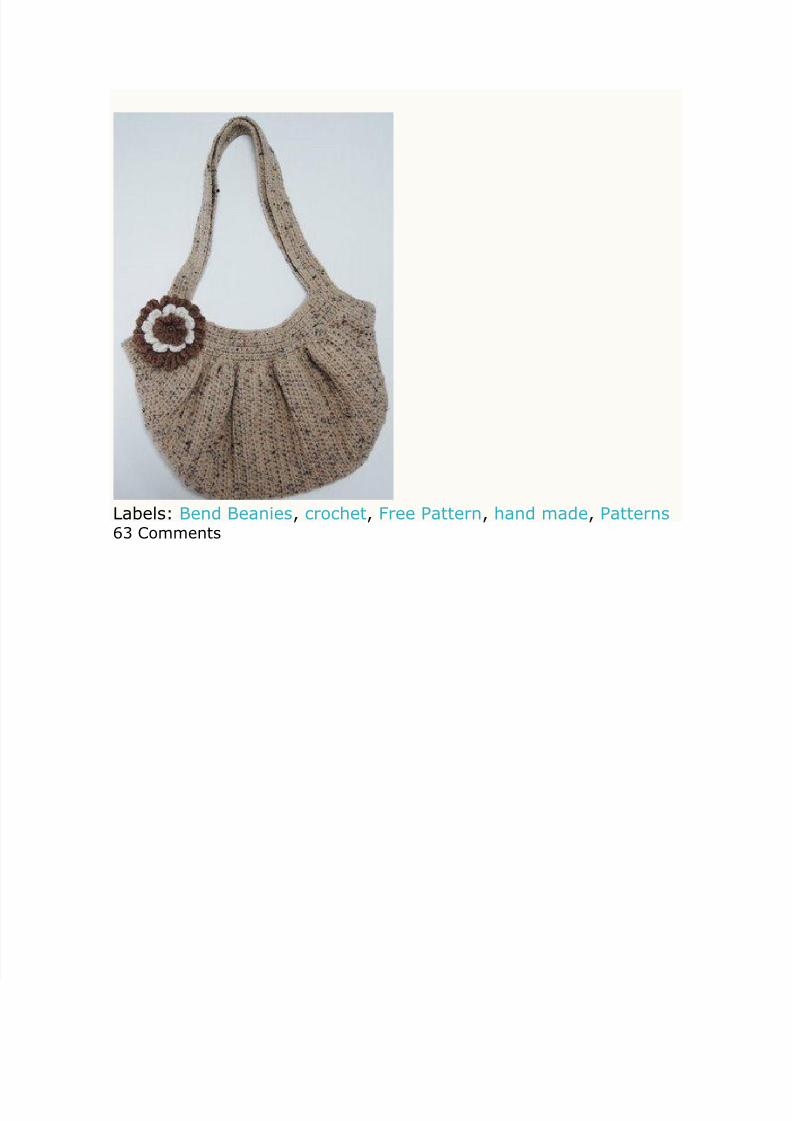
Chain 1, turn, and repeat this way for about 4 to 6 rows, however
you would like it to look.
There ya go! If you have any questions, leave me a comment & I'll
try to help.
P.S. Here is a link to a very similar flower - clicky
8/13/2019 Monedero Crochet Pattern
http://slidepdf.com/reader/full/monedero-crochet-pattern 11/11
Labels: Bend Beanies, crochet, Free Pattern, hand made, Patterns 63 Comments


