alarma vecinal inalámbrica - electrónica steren méxico€¦ · steren sell parts, components,...
TRANSCRIPT
Alarma vecinal inalámbrica
Manual de instrucciones V1.0/0318v
2
Antes de utilizar el producto, lea cuidadosamente este manual para evitar cualquier mal funcionamiento.La información presentada sirve únicamente como refe-rencia sobre el producto. Consulte nuestra página web www.steren.com para obtener la versión más reciente de este manual.
La operación de este equipo está sujeta a las siguientes dos condiciones: (1) es posible que este equipo o dispositivo no cause interferencia perjudicial y (2) este equipo o dispositivo debe aceptar cualquier interferencia, incluyendo la que pueda causar su operación no deseada.
• Este aparato no se destina para utilizarse por personas (incluyendo niños), cuyas capacidades físicas, sensoriales o mentales sean diferentes o estén reducidas, o carezcan de experiencia o conocimiento.• Los niños deben supervisarse para asegurar que no empleen el aparato como juguete.• Cualquier reparación no autorizada puede ocasio-nar mal funcionamiento y anulará la garantía.• Evite las caídas del equipo; podría sufrir daños severos.• No coloque objetos pesados sobre el dispositivo.
PRECAUCIONES
3
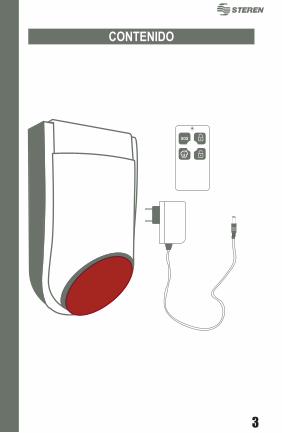
CONTENIDO
4
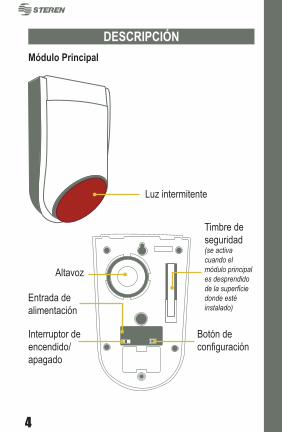
DESCRIPCIÓNMódulo Principal
Luz intermitente
Timbre de seguridad(se activa cuando el módulo principal es desprendido de la superficie donde esté instalado)
Entrada dealimentación
Interruptor de encendido/apagado
Botón de configuración
Altavoz
5
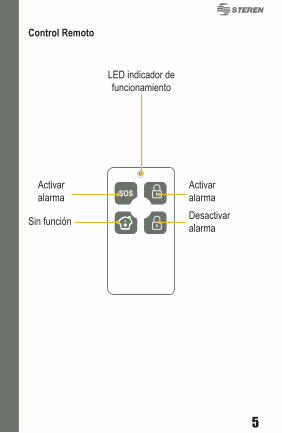
Control Remoto
LED indicador de funcionamiento
Desactivaralarma
Activaralarma
Activaralarma
Sin función
6
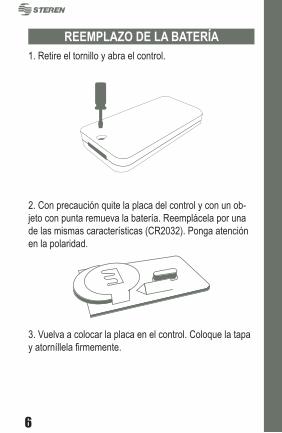
1. Retire el tornillo y abra el control.
2. Con precaución quite la placa del control y con un ob-jeto con punta remueva la batería. Reemplácela por una de las mismas características (CR2032). Ponga atención en la polaridad.
3. Vuelva a colocar la placa en el control. Coloque la tapa y atorníllela firmemente.
REEMPLAZO DE LA BATERÍA
7
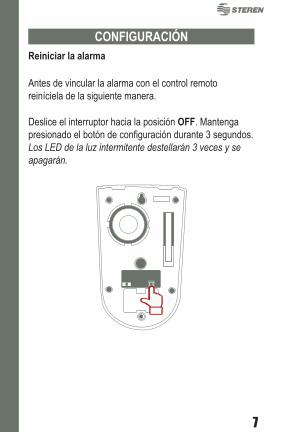
Reiniciar la alarma
Deslice el interruptor hacia la posición OFF. Mantenga presionado el botón de configuración durante 3 segundos. Los LED de la luz intermitente destellarán 3 veces y se apagarán.
CONFIGURACIÓN
Antes de vincular la alarma con el control remoto reiníciela de la siguiente manera.
8
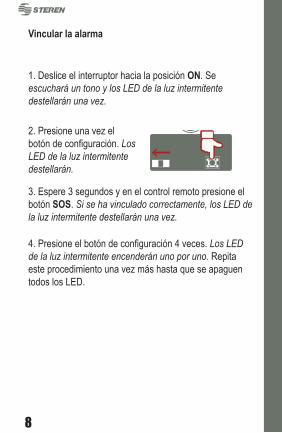
1. Deslice el interruptor hacia la posición ON. Se escuchará un tono y los LED de la luz intermitente destellarán una vez.
3. Espere 3 segundos y en el control remoto presione el botón SOS. Si se ha vinculado correctamente, los LED de la luz intermitente destellarán una vez.
4. Presione el botón de configuración 4 veces. Los LED de la luz intermitente encenderán uno por uno. Repita este procedimiento una vez más hasta que se apaguen todos los LED.
2. Presione una vez el botón de configuración. Los LED de la luz intermitente destellarán.
Vincular la alarma
9
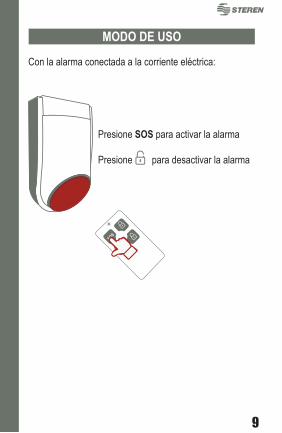
Presione SOS para activar la alarma
Presione para desactivar la alarma
MODO DE USO
Con la alarma conectada a la corriente eléctrica:
10
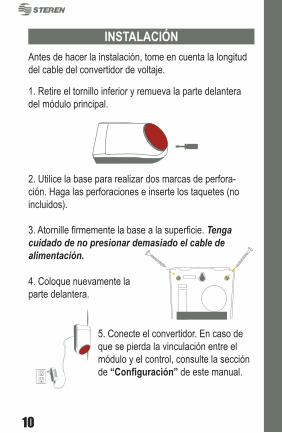
INSTALACIÓN
1. Retire el tornillo inferior y remueva la parte delantera del módulo principal.
Antes de hacer la instalación, tome en cuenta la longitud del cable del convertidor de voltaje.
2. Utilice la base para realizar dos marcas de perfora-ción. Haga las perforaciones e inserte los taquetes (no incluidos).
3. Atornille firmemente la base a la superficie. Tenga cuidado de no presionar demasiado el cable de alimentación.
4. Coloque nuevamente la parte delantera.
5. Conecte el convertidor. En caso de que se pierda la vinculación entre el módulo y el control, consulte la sección de “Configuración” de este manual.
11
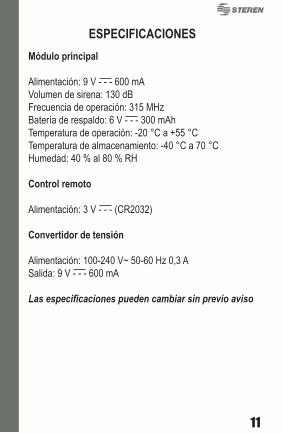
Módulo principal
Alimentación: 9 V - - - 600 mAVolumen de sirena: 130 dBFrecuencia de operación: 315 MHzBatería de respaldo: 6 V - - - 300 mAhTemperatura de operación: -20 °C a +55 °CTemperatura de almacenamiento: -40 °C a 70 °CHumedad: 40 % al 80 % RH
Control remoto
Alimentación: 3 V - - - (CR2032)
Convertidor de tensión
Alimentación: 100-240 V~ 50-60 Hz 0,3 ASalida: 9 V - - - 600 mA
Las especificaciones pueden cambiar sin previo aviso
ESPECIFICACIONES
12
Producto: Alarma vecinal inalámbricaModelo: ALA-2000Marca: Steren
Esta póliza garantiza el producto por el término de un año en todas sus partes y mano de obra, contra cualquier defecto de fabricación y funcionamiento, a partir de la fecha de entrega.CONDICIONES1.- Para hacer efectiva la garantía, presente esta póliza y el producto, en donde fue adquirido o en Electrónica Steren S.A. de C.V.2.- Electrónica Steren S.A de C.V. se compromete a reparar el producto en caso de estar defectuoso sin ningún cargo al consumidor. Los gastos de transportación serán cubiertos por el proveedor.3.- El tiempo de reparación en ningún caso será mayor a 30 días,contados a partir de la recepción del producto en cualquiera de los sitios donde pueda hacerse efectiva la garantía.4.- El lugar donde puede adquirir partes, componentes, consumibles y accesorios, así como hacer válida esta garantía es en cualquiera de las direcciones mencionadas posteriormente.
ESTA PÓLIZA NO SE HARÁ EFECTIVA EN LOS SIGUIENTES CASOS:1.- Cuando el producto ha sido utilizado en condiciones distintas a las normales.2.- Cuando el producto no ha sido operado de acuerdo con el instructivo de uso.3.- Cuando el producto ha sido alterado o reparado por personal no autorizado por Electró-nica Steren S.A. de C.V. El consumidor podrá solicitar que se haga efectiva la garantía ante la propia casa comercial donde adquirió el producto. Si la presente garantía se extraviara, el consumidor puede recurrir a su proveedor para que le expida otra póliza, previa presentación de la nota de compra o factura respectiva.
DATOS DEL DISTRIBUIDORNombre del DistribuidorDomicilio Producto Marca ModeloNúmero de serie Fecha de entrega
ELECTRÓNICA STEREN, S.A. DE C.V.Biólogo Maximino Martínez No. 3408 San Salvador Xochimanca, Del. Azcapot-zalco, Ciudad de México, 02870, RFC: EST850628-K51
STEREN PRODUCTO EMPACADO S.A. DE C.V.Autopista México-Querétaro. Km 26.5 Sin número, Nave Industrial 3-A, Col. Lomas de Boulevares, Tlalnepantla de Baz, Estado de México, C.P. 54020, RFC: SPE-941215-H43
CENTRO DE ATENCIÓN
A CLIENTES
01 800 500 9000
WIRELESS ALARM
User Manual V1.0/0318v
14
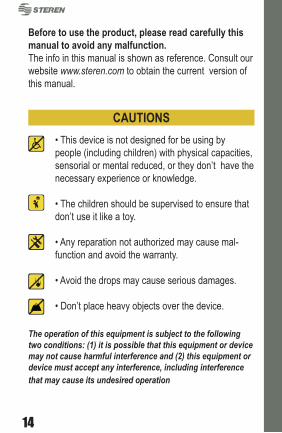
Before to use the product, please read carefully this manual to avoid any malfunction. The info in this manual is shown as reference. Consult our website www.steren.com to obtain the current version of this manual.
The operation of this equipment is subject to the following two conditions: (1) it is possible that this equipment or device may not cause harmful interference and (2) this equipment or device must accept any interference, including interference that may cause its undesired operation
• This device is not designed for be using by people (including children) with physical capacities, sensorial or mental reduced, or they don’t have the necessary experience or knowledge.
• The children should be supervised to ensure that don’t use it like a toy.
• Any reparation not authorized may cause mal-function and avoid the warranty.
• Avoid the drops may cause serious damages.
• Don’t place heavy objects over the device.
CAUTIONS

15
CONTENT
16
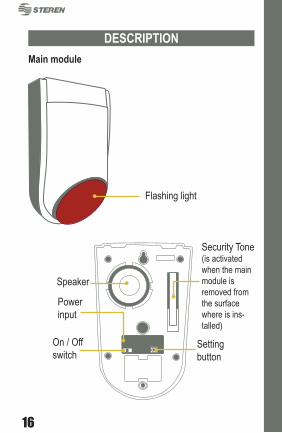
DESCRIPTIONMain module
Flashing light
Powerinput
On / Offswitch
Settingbutton
Security Tone(is activated when the main module is removed from the surface where is ins-talled)
Speaker
17
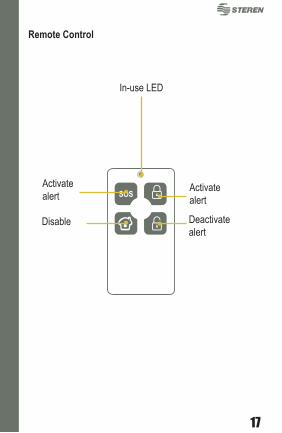
Remote Control
In-use LED
Deactivatealert
Activatealert
Activatealert
Disable
18
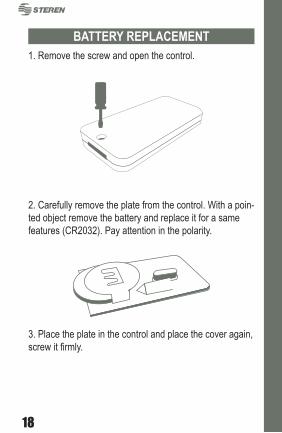
1. Remove the screw and open the control.
2. Carefully remove the plate from the control. With a poin-ted object remove the battery and replace it for a same features (CR2032). Pay attention in the polarity.
3. Place the plate in the control and place the cover again, screw it firmly.
BATTERY REPLACEMENT

19
CONFIGURATIONBefore to start the settings process you must restart the alarm.1. Slide the switch to the ON position. You will hear a tone and the LED of the blinking light, will flashing once.
3. Wait for 3 seconds, in the remote control press SOS button. If the pairing is success the LED of the blinking light, will flashing once.
4. Press the setting button 4 times. The LED of the blinking light, will turn on one by one, repeat this process until the LED power off.
2. Press once the setting button. The LED of the blinking light, will flashing.
20
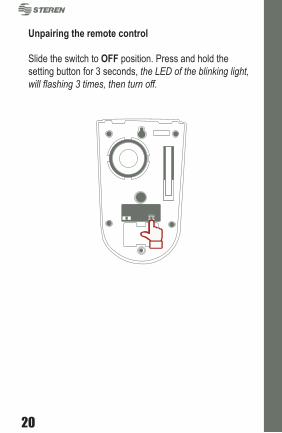
Unpairing the remote control
Slide the switch to OFF position. Press and hold the setting button for 3 seconds, the LED of the blinking light, will flashing 3 times, then turn off.

21
HOW TO USE
Press SOS to activate the alarm
Press to deactivate the alarm
With the alarm connected into an outlet:
22
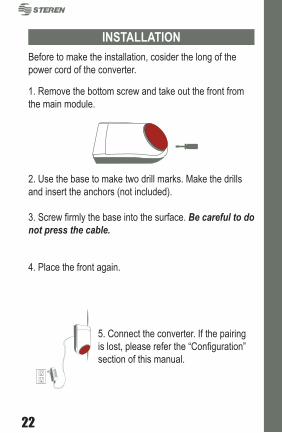
INSTALLATION
1. Remove the bottom screw and take out the front from the main module.
Before to make the installation, cosider the long of the power cord of the converter.
2. Use the base to make two drill marks. Make the drills and insert the anchors (not included).
3. Screw firmly the base into the surface. Be careful to do not press the cable.
4. Place the front again.
5. Connect the converter. If the pairing is lost, please refer the “Configuration” section of this manual.
23
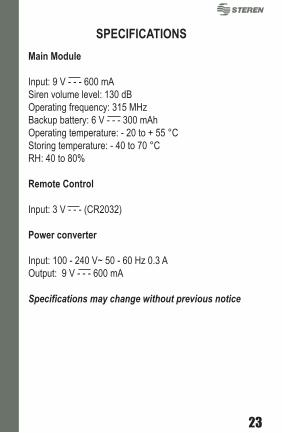
Main Module
Input: 9 V - - - 600 mASiren volume level: 130 dBOperating frequency: 315 MHzBackup battery: 6 V - - - 300 mAhOperating temperature: - 20 to + 55 °CStoring temperature: - 40 to 70 °CRH: 40 to 80%
Remote Control
Input: 3 V - - - (CR2032)
Power converter
Input: 100 - 240 V~ 50 - 60 Hz 0.3 AOutput: 9 V - - - 600 mA
Specifications may change without previous notice
SPECIFICATIONS
24
Product: Wireless AlarmNumber part: ALA-2000Brand: Steren
This Steren product is warranted under normal usage against defects in workmanship and materials to the original purchaser for one year and three months in the battery from the date of purchase.CONDITIONS1. This warranty card with all the required information, invoice or purchase ticket, product box or package, and product, must be presented when warranty service is required.2. If the product is in the warranty time, the company will repair it free of charge.3. The repairing time will not exceed 30 natural days, from the day the claim was received.4. Steren sell parts, components, consumables and accessories to custo-mer, as well as warranty service, at any of the addresses mentioned later.THIS WARRANTY IS VOID IN THE NEXT CASES:If the product has been damaged by an accident, acts of God, mishandling, leaky batteries, failure to follow enclosed instructions, improper repair by unauthorized personnel, improper safe keeping, among others.a) The consumer can also claim the warranty service in the purchase establishment.b) If you lose the warranty card, we can reissue it, if you show the invoice or purchase ticket.
RETAILER INFORMATION
Name of the retailer______________Address _______________________Product ________________________Brand _________________________Serial number ___________________
Date of delivery __________________
CUSTOM SERVICE CENTER
01 800 500 9000

25